TheOpenDirectory.org-Member of the World's Website Directory.
레이블이 easy-to-follow Self Nail인 게시물을 표시합니다. 모든 게시물 표시

2014년 7월 21일 월요일

[Sara Nail] Heart French Self Gel Nail Art !

Heart French Self Gel Nail Art <3
Today, I prepared a heart French gel nail art that's soooooo lovely :)
Let me show you the completed pictures first.


It's really similar to deep French, but I used a brush to draw a heart.
Pink and light pink go so well together.
I used Honey Pot products for this nail art too.


Heart deep French, new flowery powder, letting sticker, and a lovely ribbon stone!

Heart French nail art became famous because Suzy from Miss A did it :)
Also, it's very simple to draw too :)


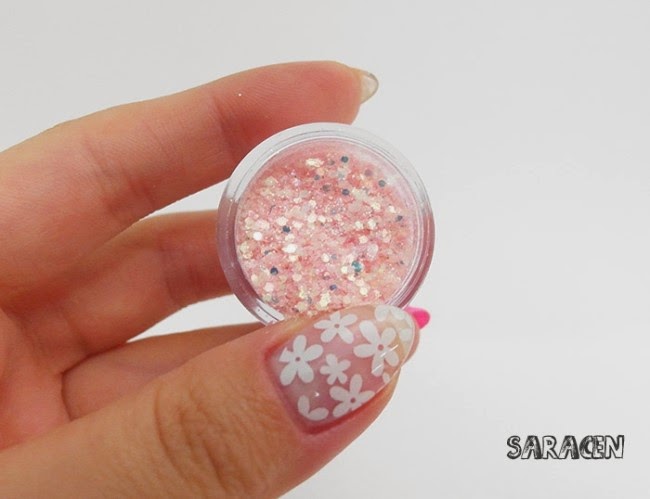
New flowery posder. Mix 2~3 colors to make your nails more beautiful.


You MUST use overlay gel and file to use these products.


This is the oval tip completed with overlay gel and filing. It's really smooth on the surface.


This is the overlay gel that I used.
Please use overlay gel when you put glitter or flower powder!

Remember, if you don't use overlay gel, glitters can fall off!


Pretty ribbon stones :D


This is lala letteting sticker.
It's very smooth, and it sticks to your nails so well.
Beginners can easily use this product.


Heart French Nail Art Tools

1. Honey Pot base gel
2. Honey Pot HP04 If Only
3. Honey Pot HB21 18/19
4. Honey Pot Top Gel
5. Beaunix Clear Gel
6. Pearl Ribbon Stone
7. Lala Professional Art Sticker 123 - Lettering
8. Flower powder - hot pink, pink, ivory


Click to purchase Sara Nail products! ↓

2014년 7월 11일 금요일

[SARANAIL] Easy self nail art with gel stickers! - Monster Nails Gel Strip

Easy Gel Nail Art with Monster Nails Gel Strip!
It's nail art time again! YAY!
Today, I'll do an easy nail art with monster nails gel strip!

Let's get started.


We'll look at the completed pictures first.
I used gel patch (Monster Gel Strip) to give a see-through look.
I put glitters and a huge ribbon to make my nails look more refined.


Tools:

1. Honey Pot Bonder
2. Honey Pot Base Gel
3. I'm JB - JB35 (Neon)
4. Frenz Magic Glitter Overlay Gel
5. Honey Pot Top Gel
6. Honey Pot Glitter Hologram (094 RX) & Glitter Circle Mix (060 RX)
7. Monster Gel Strip 104
8. Vuv Mu Girl Nail Sticker - Juicy Orange


This is Honey Pot Hologram Mixed RX 094.
There are small and large sizes of little glitters.
Shapes are pentagon, square, etc...
so this product gives a variety of feelings to my nails.


This is Honey Pot Glitter 060 RX that's great for summer.
To put this on your nails, please use overlay gel.


Cute little girl stones.
I used hot pink color for this nail art.
Aren't these soo cute?!


These stones attach to my fingernails with stability.


This is Monster Nails Gel Strip 104.
Flower pattern, see-through.


How to use gel strips
1. Cut the strip with the size you want.
2. Pull and attach the strip at the same time.
But do not pull too hard!
3. Transparent gel strip needs to be colored with white or bright gel colors
so that it looks prettier.
4. Monster Nails gel strip is ONLY for gel colors.
If you use Monster Gel Strip with regular nail colors,
it gets crumpled.


Second finger - Vuv Mu Girl Nail Sticker - Juicy Orange.


COMPLETE!


I finished this nail art with a huge ribbon and top gel.


PLEASE leave a comment if you want one of these tools.
I can list these products in eBay so that you can buy these!!! :D


Click if you want to purchase Monster Nail Gel Strips!

2014년 7월 9일 수요일

[SARANAIL] Blue Love Pearl Nail Art

Blue Love Pearl Nail Art

The Saracen Art Class - Blue Love Gel Nail Art

Looks great for beach, right?


Blue Love Gel Nail Art Instructions

1. Put bonder on, and dry it with natural air.

2. Put base gel on, then cure for 30 seconds.

3. Put blue gel nail polish on, then cure for 30 seconds.

4. Put blue gel nail polish on again, then cure for 30 seconds.

5. Using a brush, draw a white heart. Color it twice. Cure for 30 seconds.

6. Using a brush, white love with black color and cure for 1 minute.

7. Put top get on the edges of the heart.

8. Using a wood stick, put silver balls on the edge of the heart.
Cure for 30 seconds.

9. Put top gel on the heart, then cure for 30 seconds.

10. Put top gel on the whole nail, then cure for 1 minute.

11. Cleanse the nail with gel cleanser.

Blue Love Gel Nail Art Complete!

2014년 7월 8일 화요일

[SARANAIL] Hello Kitty Self Nail Art - SUMMER!

Hello Kitty Self Nail Art for Summer!
Today, I'll introduce you a nail art that combines neon nail colors and silver Hello Kitty.
It's perfect for this summer. :D


Let's get started!

Hello Kitty self-nail art

1. Put base gel on. 30 second curing needed!

2. Cleanse the nail.

3. Using a pinset, put Kitty sticker on the nail.

4. Put neon gel nail color on the pallete.

5. Using a line brush, draw a line. 30 second curing needed.

6. Put top gel on.

7. Put silver dots on the nail. 1 minute curing needed.

8. Cleanse the nail.

9. Complete!
[출처] [더사라센 아트클래스] 키티 셀프네일아트! |작성자 더사라센
Related Posts Plugin for WordPress, Blogger...